

Step 1
At this early stage, you probably already know where you should be heading. Yeah, right ... create a new document, in order to more quickly use Ctrl + N to open a new document window. Having set out the new window size with width: 500 px, Height: 400px, for more details see the image below:

Step 2
In step two, we must use the Pen Tool, because we will make a beautiful arch lines, for fast trick please press "P" on the keyboard. If you already make a curved line according to your taste. But if you want to follow this tutorial, just follow the curvature of the following images:

After you create a line of arches as shown above, now please copy and paste the line in place. To copy and paste in place you simply press Ctrl + C (previously enabled before the object will be copied), then press Ctrl + F (to paste in Place). See the results, which you paste the line will remain in the position of how many lines you copied. (Info trick: Unlike you do Ctrl + V, the function may be the same but different results). Let us proceed, the results should paste in place before you edit a picture like the following:


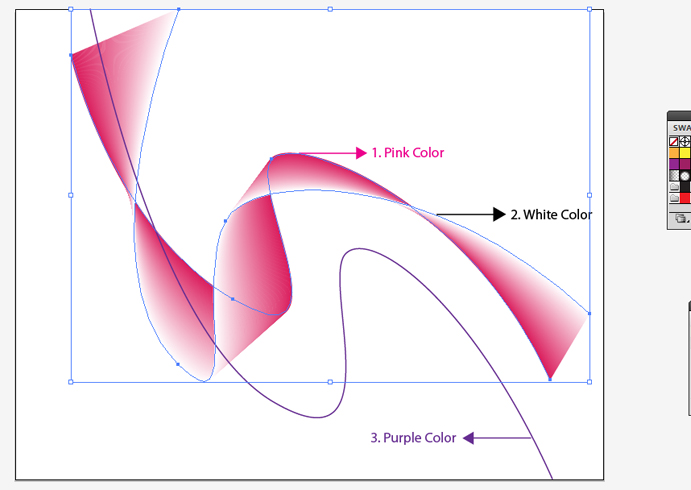
Step 3
If all three lines had been to edit such images I have provided or in accordance with your wishes, do change the color of each curved line earlier. Here I use the color Pink for the main line, white on the second line, and purple on the third line, look at the picture below.

Step 4
After doing a color change on each curved line that you created earlier. The third time beautify the curved lines. The trick is, choose the + Object + Blend Blend Option. If you do not understand please follow the following picture:

If the option is out the window blend arrange Spacing: Specified Steps = 120 (Note: I use 120 to par, and you can try it under 120 or so) and press OK. for more details see the image below:

Step 5
It seems that you are more curious about this ... Let's move on, after you set your window Blend Option earlier, it is time to see the effects blend the creativity of your option. Turn Pink and White colored lines and then press Ctrl + Alt + B and see the results. Furthermore Ctrl + A to enable all objects and do another Ctrl + Alt + B, see the results.
(The Results Blending effect)

(The experimental results)
Good luck ...
Title : How to use the Blend Tool in Adobe Illustrator
Description : In this tutorial I will explain, how to use the blend tool in Adobe Illustrator. If you already know the basics of using Adobe Illustrator...
Description : In this tutorial I will explain, how to use the blend tool in Adobe Illustrator. If you already know the basics of using Adobe Illustrator...


0 Response to "How to use the Blend Tool in Adobe Illustrator"
Post a Comment
Please give positive comment here,"NOT SPAM"